Manual Installation of Bliss OS on Linux#
⏱ Estimated time: ~20 minutes | 🔧 Difficulty: Intermediate | ✅ Tested on: Ubuntu, Void Linux (x86_64)
What is Bliss OS?#
Bliss OS is a powerful Android x86 operating system designed to run natively on PCs and laptops. Unlike an emulator such as Android Studio AVD or Genymotion, Bliss OS boots directly from your GRUB menu and runs Android on bare metal — giving you full hardware performance without virtualization overhead.
It is built on top of the Android-x86 project and maintained by the BlissROM team. You can use it to run Android apps directly on your Linux PC, test apps in a real Android environment, or just experience Android on desktop hardware.
Why install Bliss OS manually instead of using a USB? The USB installer method creates a separate boot partition. The manual GRUB method covered here is cleaner for Linux users: you extract the ISO to a directory on your existing filesystem and add a GRUB entry — no repartitioning, no USB drive needed.
Step 1 — Download the ISO#
Go to the official download page: BlissOS-x86 on SourceForge
Choosing the Right Bliss OS Version#
Bliss OS releases are tied to Android versions. Here is a quick reference:
| Version | Android Version | API Level |
|---|---|---|
| BlissOS 16 | Android 14 (Upside Down Cake) | 34 |
| BlissOS 15 | Android 13 (Tiramisu) | 33 |
| BlissOS 14 | Android 12 (Snow Cone) | 31 |
| BlissOS Zenith | Android 10 (Q) | 29 |
Recommended: BlissOS 16 (Android 14) unless you need a specific API level for app compatibility.
GApps vs FOSS — Which Variant to Download?#
| Feature | GApps Variant | FOSS Variant |
|---|---|---|
| Google Play Store | ✅ Pre-installed | ❌ Not included |
| Google Services | ✅ Play Services, GMS | ❌ |
| Open-Source Focus | ❌ Includes proprietary apps | ✅ FOSS apps only |
| Alternative Stores | ❌ Play Store is primary | ✅ F-Droid, Aurora Store |
| MicroG Support | ❌ | ⚠️ Optional / user-installed |
| Privacy | 🔻 Lower (Google telemetry) | 🔺 Higher (no tracking) |
GApps Variant#
Includes Google Play Store, Gmail, YouTube, Maps, Drive, and Google Mobile Services (GMS). Required for apps that depend on Google APIs such as banking apps and most games.
Best for: Users who need full Android app compatibility and rely on the Google ecosystem.
Look for filenames labeled GApps, with GMS, or Google Play.
Example: BlissOS-16-x86_64-GApps-*.iso
FOSS Variant#
Ships with no proprietary Google apps. Comes with open-source alternatives: F-Droid and Aurora Store as app stores, and optionally MicroG as a lightweight Google Services replacement.
Best for: Privacy-focused users and devices with limited resources.
Look for filenames labeled FOSS, without GApps, or vanilla.
Example: BlissOS-16-x86_64-FOSS-*.iso
For this guide I use the GApps variant: Bliss-v16.9.4-x86_64-OFFICIAL-gapps-20240220.iso
Step 2 — Requirements#
Before starting, make sure you have:
- A Linux system with x86_64 architecture
- At least 4 GB of RAM (8 GB recommended for a smooth experience)
- GRUB as your bootloader (GRUB 2)
- p7zip installed (
sudo apt install p7zip-fullon Debian/Ubuntu,sudo xbps-install p7zipon Void Linux) - The root partition formatted as ext4 (see the note on NTFS in Step 3)
Step 3 — Extract the ISO and Set Up the Directory#
1. Create the Bliss OS directory at the root of your filesystem:
sudo mkdir /blissos2. Extract the ISO using 7z:
7z x Bliss-v16.9.4-x86_64-OFFICIAL-gapps-20240220.iso3. Copy the boot files to /blissos:
sudo cp initrd.img ramdisk.img kernel /blissos/These three files are what GRUB needs to boot Bliss OS:
kernel— the Android-x86 Linux kernelinitrd.img— the initial RAM disk that loads the Android environmentramdisk.img— the Android root filesystem loaded into RAM at boot
4. Create the data directory and generate the data image:
sudo mkdir /blissos/data
cd /blissos/data
sudo dd if=/dev/zero of=data.img bs=1 count=0 seek=8G
sudo mkfs.ext4 -F data.img
The data.img file acts as Android’s internal storage — it stores your apps, settings, and user data. The dd command creates a sparse 8 GB file without actually writing 8 GB to disk.
Note on NTFS / non-ext4 filesystems: The
/blissos/datadirectory approach only works on ext4 partitions. If your root filesystem is NTFS, btrfs, or you are experiencing a boot loop, you must use thedata.imgmethod shown above instead of a bare directory.
Step 4 — Add the GRUB Menu Entry#
Open /etc/grub.d/40_custom with a text editor as root:
sudo nano /etc/grub.d/40_customAdd the following entries at the bottom of the file:
menuentry "BlissOS (Default) w/ FFMPEG" {
    set SOURCE_NAME="blissos"
    search --set=root --file /$SOURCE_NAME/kernel
    linux /$SOURCE_NAME/kernel FFMPEG_CODEC=1 FFMPEG_PREFER_C2=1 quiet root=/dev/ram0 SRC=/$SOURCE_NAME
    initrd /$SOURCE_NAME/initrd.img
}

menuentry "BlissOS (Intel GPU) w/ FFMPEG" {
    set SOURCE_NAME="blissos"
    search --set=root --file /$SOURCE_NAME/kernel
    linux /$SOURCE_NAME/kernel HWC=drm_minigbm_celadon GRALLOC=minigbm FFMPEG_CODEC=1 FFMPEG_PREFER_C2=1 quiet root=/dev/ram0 SRC=/$SOURCE_NAME
    initrd /$SOURCE_NAME/initrd.img
}

menuentry "BlissOS PC-Mode (Default)" {
    set SOURCE_NAME="blissos"
    search --set=root --file /$SOURCE_NAME/kernel
    linux /$SOURCE_NAME/kernel quiet root=/dev/ram0 SRC=/$SOURCE_NAME
    initrd /$SOURCE_NAME/initrd.img
}

menuentry "BlissOS PC-Mode (Intel GPU)" {
    set SOURCE_NAME="blissos"
    search --set=root --file /$SOURCE_NAME/kernel
    linux /$SOURCE_NAME/kernel PC_MODE=1 HWC=drm_minigbm_celadon GRALLOC=minigbm FFMPEG_CODEC=1 FFMPEG_PREFER_C2=1 quiet root=/dev/ram0 SRC=/$SOURCE_NAME
    initrd /$SOURCE_NAME/initrd.img
}
What Do These Kernel Parameters Mean?#
| Parameter | What It Does |
|---|---|
SRC=/blissos | Tells Android-x86 where to find its system files |
root=/dev/ram0 | Boots Android from RAM (standard for Android-x86) |
FFMPEG_CODEC=1 | Enables hardware-accelerated video decoding via FFmpeg |
FFMPEG_PREFER_C2=1 | Uses the newer Codec 2.0 API for better media performance |
HWC=drm_minigbm_celadon | Sets the Hardware Composer for Intel GPUs |
GRALLOC=minigbm | Uses the minigbm graphics memory allocator (required for Intel) |
PC_MODE=1 | Enables PC-style window management (taskbar, resizable windows) |
quiet | Suppresses kernel boot messages for a cleaner boot screen |
Which entry should you use?
- Default entries — try these first on AMD/NVIDIA systems or if you are unsure
- Intel GPU entries — use these if you have an Intel integrated GPU (most laptops)
- PC-Mode — adds a taskbar and resizable app windows, closer to a desktop experience
Step 5 — Update GRUB and Reboot#
Update your GRUB configuration:
sudo update-grubYou should see a line like Found BlissOS (Default) w/ FFMPEG in the output, confirming GRUB detected the new entries.
Reboot your system:
sudo rebootAt the GRUB menu, select your preferred Bliss OS entry. The first boot takes 1–2 minutes while Android initializes. You will then go through the standard Android setup wizard. If you chose the GApps variant, sign into your Google account to access the Play Store.
Troubleshooting#
Black screen after selecting Bliss OS in GRUB#
- Try the Intel GPU entry if you are on Intel integrated graphics
- Add
nomodesetto the kernel parameters to disable KMS: edit the line starting withlinuxin40_customand appendnomodesetbeforequiet - Make sure
kernel,initrd.img, andramdisk.imgare all present in/blissos/
Boot loop (keeps restarting Android)#
This is almost always a data partition issue. Make sure you created data.img correctly:
sudo ls -lh /blissos/data/data.imgIf the file is missing or 0 bytes, recreate it:
sudo dd if=/dev/zero of=/blissos/data/data.img bs=1 count=0 seek=8G
sudo mkfs.ext4 -F /blissos/data/data.img
GRUB does not show the Bliss OS entries#
Run sudo update-grub again and look at the output. If the entries are not found, check that the file /blissos/kernel exists and that /etc/grub.d/40_custom is executable:
sudo chmod +x /etc/grub.d/40_custom
sudo update-grub
Touchpad / mouse not working inside Bliss OS#
Add INPUT_FIXES=1 to the kernel parameters line in your GRUB entry.
Apps crashing or not installing#
Some Play Store apps block x86 devices. Install Aurora Store from within Bliss OS to bypass device checks, or use ADB sideloading.
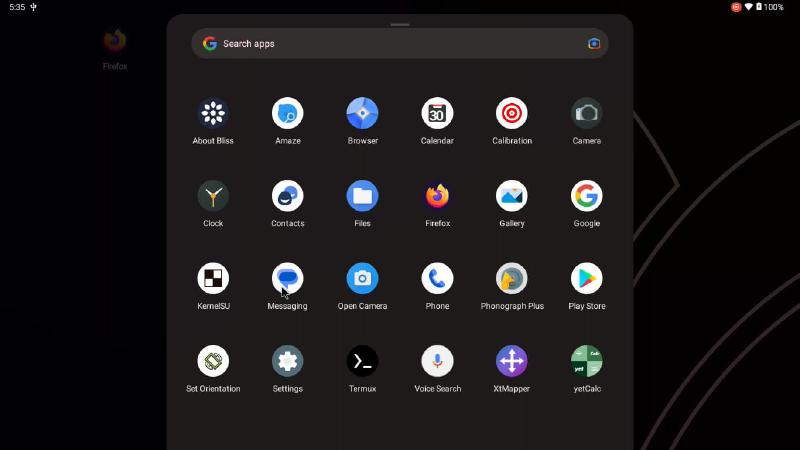
Verify It’s Working#
Once Bliss OS boots successfully, confirm everything is working:
- Display — the screen should render at your native resolution. If it looks stretched, go to Settings → Display → Screen Resolution.
- Network — open the browser and load a webpage. Wi-Fi should work out of the box if your card is supported.
- Google Play (GApps variant) — sign in and install a test app.
- Video playback — play a YouTube video to confirm FFmpeg hardware decoding is active (smooth 1080p without high CPU usage).
Summary#
You now have Bliss OS installed on your Linux PC without a USB drive or repartitioning. The key steps were: extracting the ISO to /blissos, creating a data.img for persistent Android storage, and adding GRUB entries with the right kernel parameters for your GPU.
If you run into issues not covered here, the BlissOS XDA thread and the official BlissOS Telegram group are the best places to get help.